
Install Visual Studio Code
Visual Studio Code is a versatile, user-friendly source code editor that supports extensions for multiple languages, including C#, C++ and python. Follow these steps to install Visual Studio Code on Linux and set up the necessary extensions.
Install Visual Studio Code
Section titled “Install Visual Studio Code”-
Download Visual Studio Code
Visit the Visual Studio Code download page and select the
.debpackage for Ubuntu/Debian systems. This will download the installer to your defaultDownloadsfolder.
-
Open a Terminal
Open a terminal on your system:
- Use the application menu to find “Terminal.”
- Or press
Ctrl + Alt + Tas a shortcut on most Ubuntu systems.
-
Navigate to the Download Location
By default, downloaded files are saved in the
~/Downloadsdirectory. Navigate there using:Terminal window cd ~/DownloadsThen run the following command to install Visual Studio Code:
Terminal window sudo dpkg -i code_1.*.deb
For Arch Linux, you have two primary installation options:
-
Install the Proprietary Visual Studio Code Binary from the AUR (preferred option)
This version includes Microsoft branding and telemetry, it’s maintained by the Arch User Repository (AUR). Install it with:
Terminal window yay -S visual-studio-code-binNote: If
yayis not installed, you can use another AUR helper (such asparu) or follow the AUR manual installation instructions. -
Install the Official Open-Source Version (Code - OSS)
The open-source version of Visual Studio Code is available directly from the Arch community repositories.
Install it using:
Terminal window sudo pacman -S code
-
Add the Repository
Open a terminal and add the Visual Studio Code repository and GPG key using the following commands:
Terminal window sudo rpm --import https://packages.microsoft.com/keys/microsoft.ascecho -e "[code]\nname=Visual Studio Code\nbaseurl=https://packages.microsoft.com/yumrepos/vscode\nenabled=1\ngpgcheck=1\ngpgkey=https://packages.microsoft.com/keys/microsoft.asc" | sudo tee /etc/yum.repos.d/vscode.repo > /dev/null -
Update the Package Cache
Update the package cache to ensure your system recognizes the new repository:
Terminal window dnf check-update -
Install Visual Studio Code
For Fedora 22 and newer, install Visual Studio Code using:
Terminal window sudo dnf install codeFor older systems, use:
Terminal window sudo yum install code
Installing Extensions for Development
Section titled “Installing Extensions for Development”After setting up Visual Studio Code, enhance your development environment by adding essential extensions for C#, C++, and Python. These extensions provide robust tools for coding, debugging, and code intelligence, making your setup complete for SplashKit projects.
C# Extensions
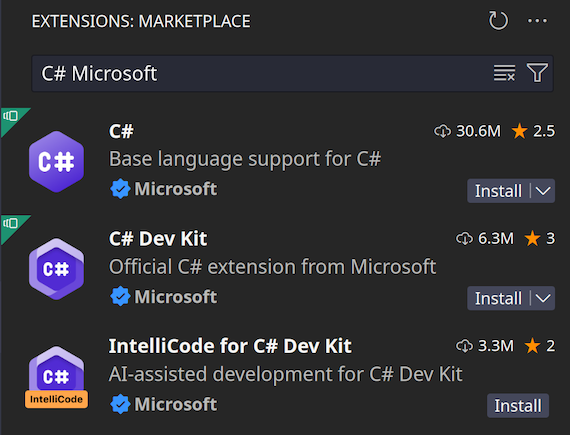
Section titled “C# Extensions”You can install these C# extensions directly from the terminal by running:
code --install-extension ms-dotnettools.csharpcode --install-extension ms-dotnettools.csdevkitTo add these extensions within Visual Studio Code:
- Open the Extensions view by pressing
Ctrl+Shift+X. - Search for “C#” and the top 2 extensions listed above should appear. Click Install for each. If they don’t then search for them individually.
C++ Extensions
Section titled “C++ Extensions”To install the C++ Extension Pack directly from the terminal:
code --install-extension ms-vscode.cpptools-extension-packTo add the C++ extension within Visual Studio Code:
- Open the Extensions view (
Ctrl+Shift+X). - Search for “C++ Extension Pack” and click Install.
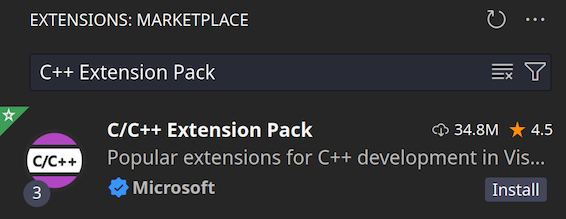
Install the C++ Extension Pack for comprehensive C++ support:
C++ Extension PackPython Extensions
Section titled “Python Extensions”To install the Python extension directly from the terminal:
code --install-extension ms-python.pythonTo install the Python extension within Visual Studio Code:
- Open the Extensions view (
Ctrl+Shift+X). - Search for “Python” and click Install.
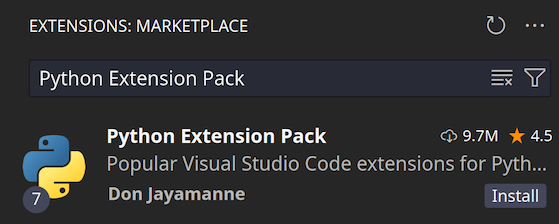
For Python support, install the Python extension from the Visual Studio Marketplace:
PythonNext Steps
Section titled “Next Steps”Congratulations! You’ve completed the setup of everything you need to get started with SplashKit. You’re now ready to start developing.