Install SplashKit
SplashKit is a beginner’s all-purpose software toolkit that will allow you to create fun and exciting programs more easily, especially for Graphical User Interface (GUI) programs.
Follow these steps to set up SplashKit on macOS and begin building interactive, visually appealing applications!
Installation Steps
-
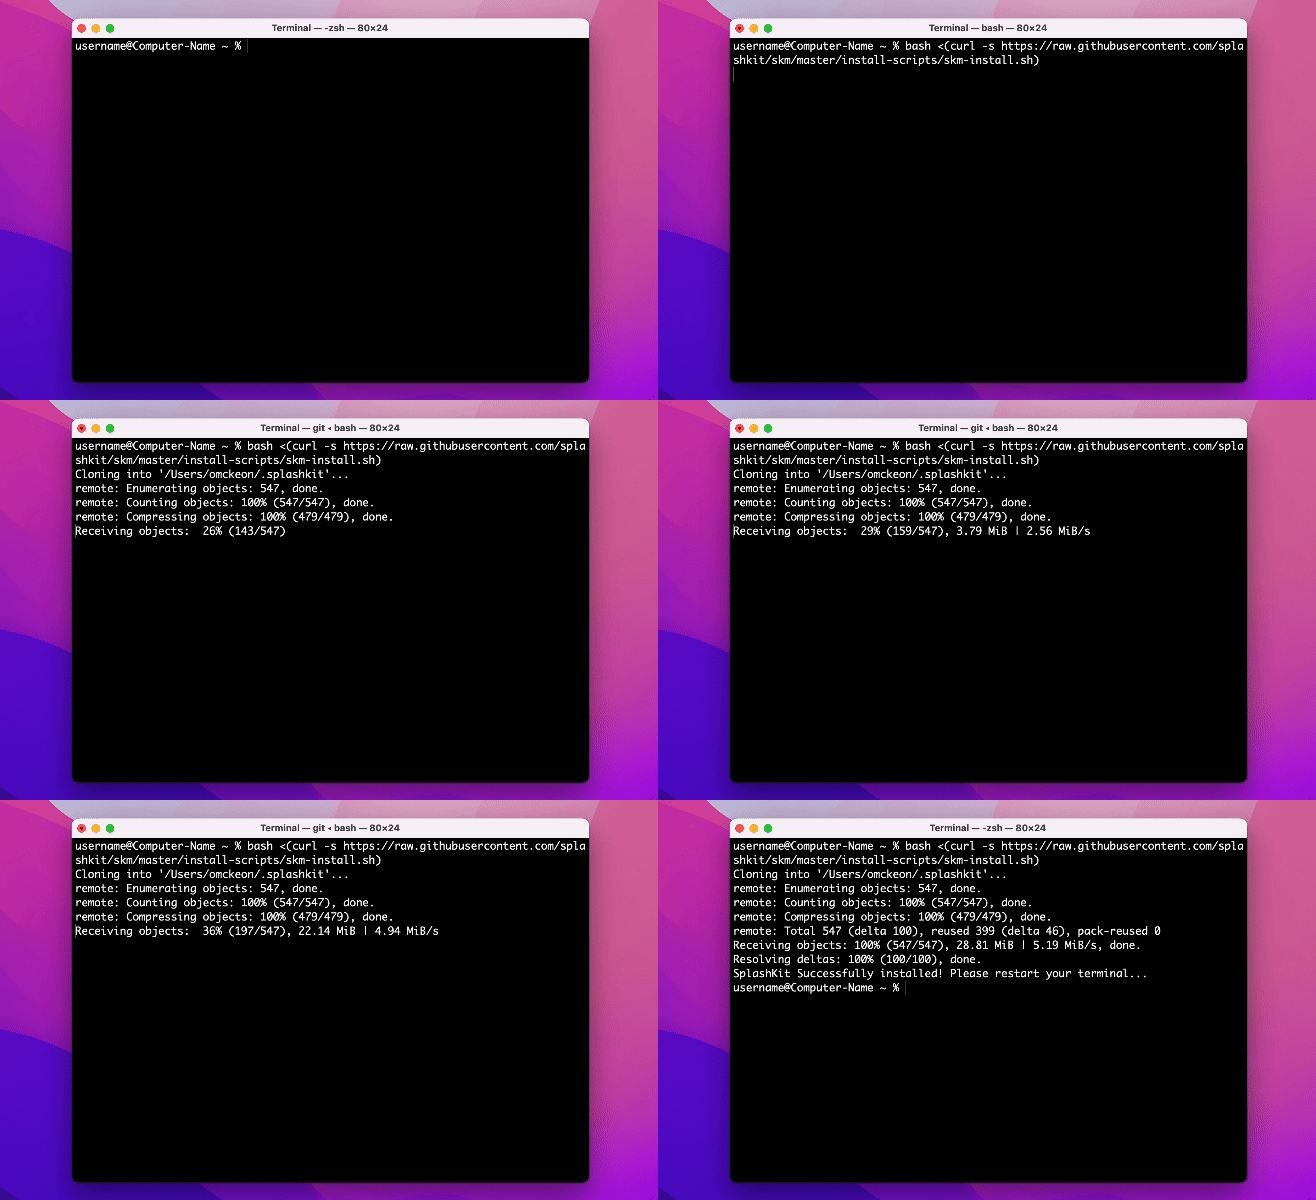
Run the SplashKit Installer
Open your Terminal and paste the following command to download and install SplashKit:
Terminal window bash <(curl -s https://raw.githubusercontent.com/splashkit/skm/master/install-scripts/skm-install.sh)This command downloads the installer directly from the SplashKit homepage.

-
Verify the Installation
Restart your Terminal to ensure the new installation path is recognized. Then, enter the following command to check if SplashKit Manager (
skm) is installed:Terminal window skmYou should see a message confirming the installation:
Terminal window SplashKit is installed successfully!Missing skm command. For help, use 'skm help'Tip: Use
skm helpto explore additional commands for managing SplashKit. -
Install Dependencies and Compile SplashKit
(Optional for users on the latest macOS version)
To install any necessary dependencies and compile SplashKit, use:Terminal window skm macos install -
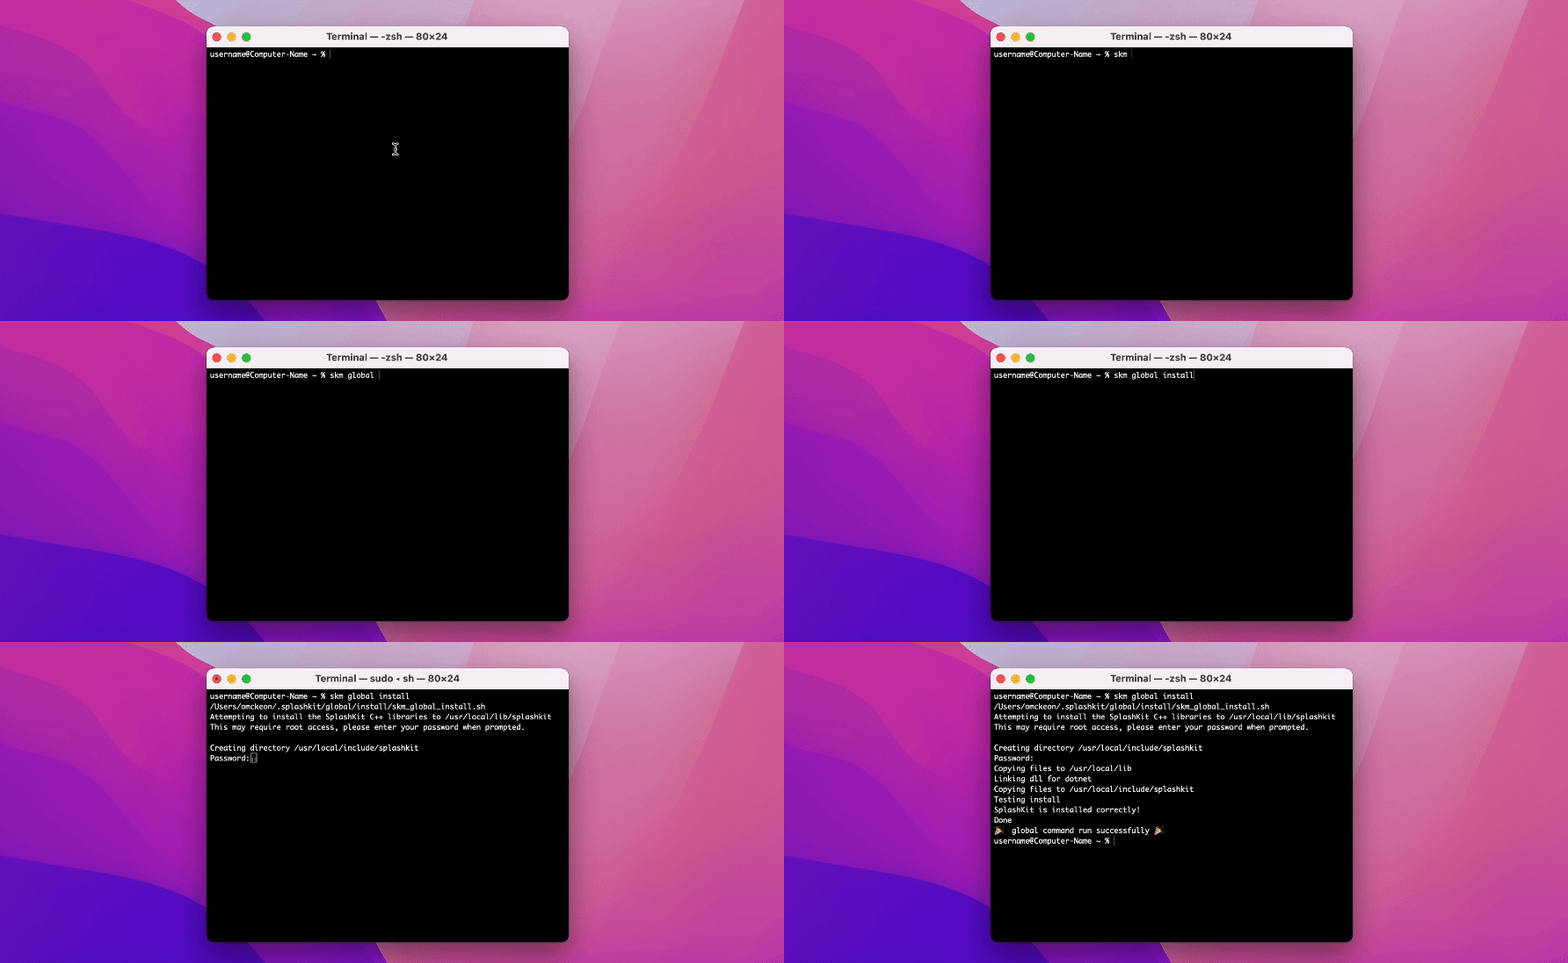
Install SplashKit Globally
For easier access, install SplashKit globally by running:
Terminal window skm global install