
Permission issue when running SplashKit installation command
Solution(s)
1: Update File Permissions using Terminal
-
Open the Terminal App, and run the following command:
Terminal window sudo chmod a=rw ~/.zshrc -
Remove the existing
.splashkitfolder by running the following command:Terminal window rm -rf ~/.splashkit -
Close and reopen the Terminal, and run the initial install script command again:
Terminal window bash <(curl -s https://raw.githubusercontent.com/splashkit/skm/master/install-scripts/skm-install.sh)
If you still have issues, try the steps below:
2: Update File Permissions using Finder
To resolve this issue using Finder rather than the terminal, you can update the file permissions with the following steps:
-
Open Finder.
-
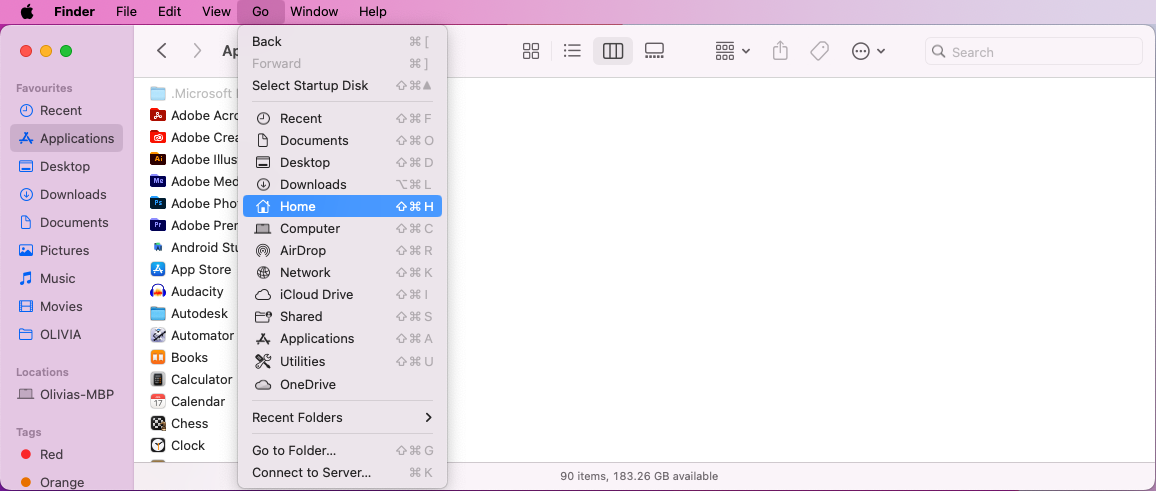
Click on “Go” at the top of the screen, then “Home”:
-
Click into the Macintosh HD (or similar) folder, then the Users folder, and finally, click into the folder with your computer’s username.
-
Show the hidden files with the shortcut:
Shift+Command+.and you should be able to scroll down to see the file mentioned in the terminal error.Here is an example to show the hidden
.zshrcfile mentioned in the screenshots above:
-
Right-click on the file and then select “Get Info”.
You will see something that looks similar to this: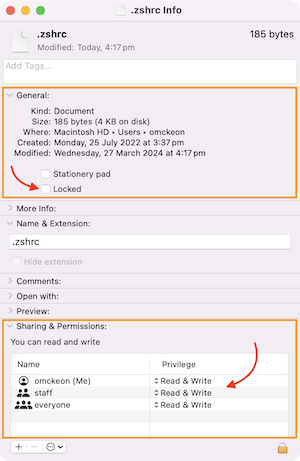
-
Check the information in the orange boxes shown in the image above:
- Make sure the “Locked” checkbox is not ticked (as shown above).
- Make sure the file has “Read & Write” Privileges for at least your username, but sometimes you may need to change all of them to Read & Write.
-
Close the Info window.
-
Open your terminal and run the SplashKit installation script command again:
Terminal window bash <(curl -s https://raw.githubusercontent.com/splashkit/skm/master/install-scripts/skm-install.sh) -
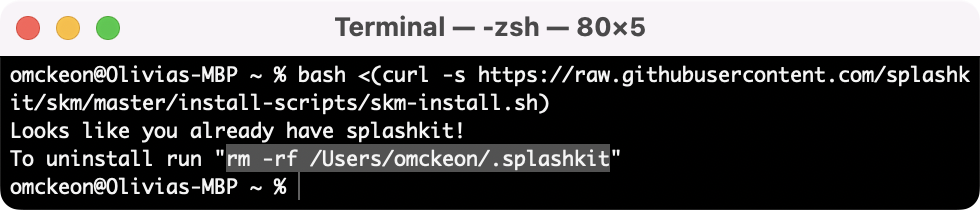
If you get a message the SplashKit is already installed, copy the text to uninstall (highlighted in the image below - yours will have a different username):
-
Paste and run the command to uninstall SplashKit.
-
Close and re-open the Terminal and run the SplashKit installation script command again.
-
SplashKit should now be able to install successfully, so you can continue on with the next installation step.